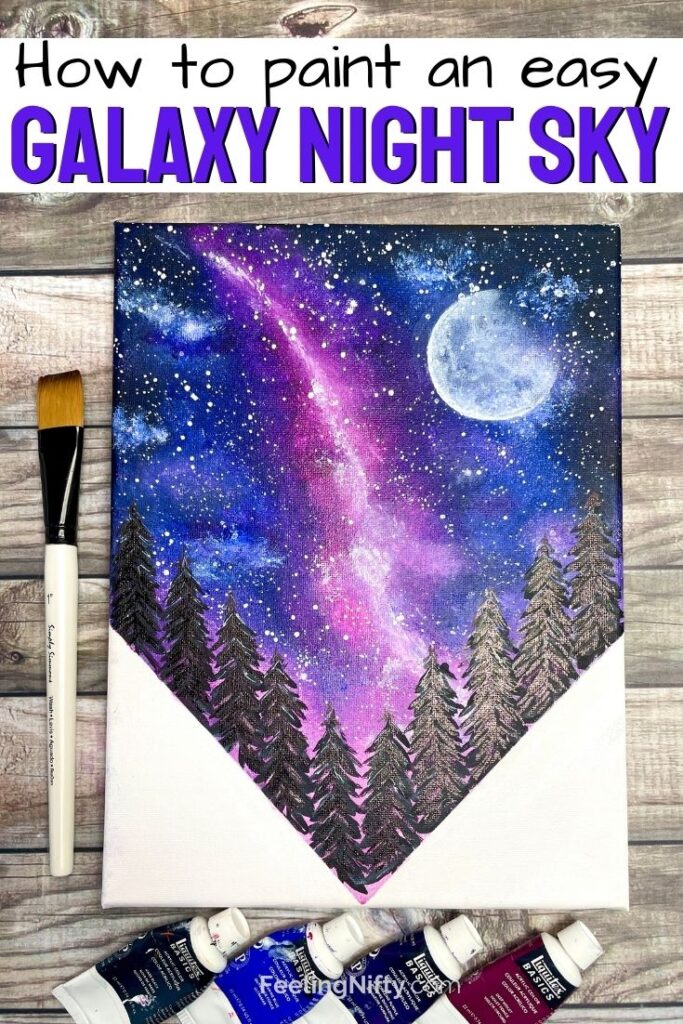
How to Draw Galaxy With Acrylic Paint
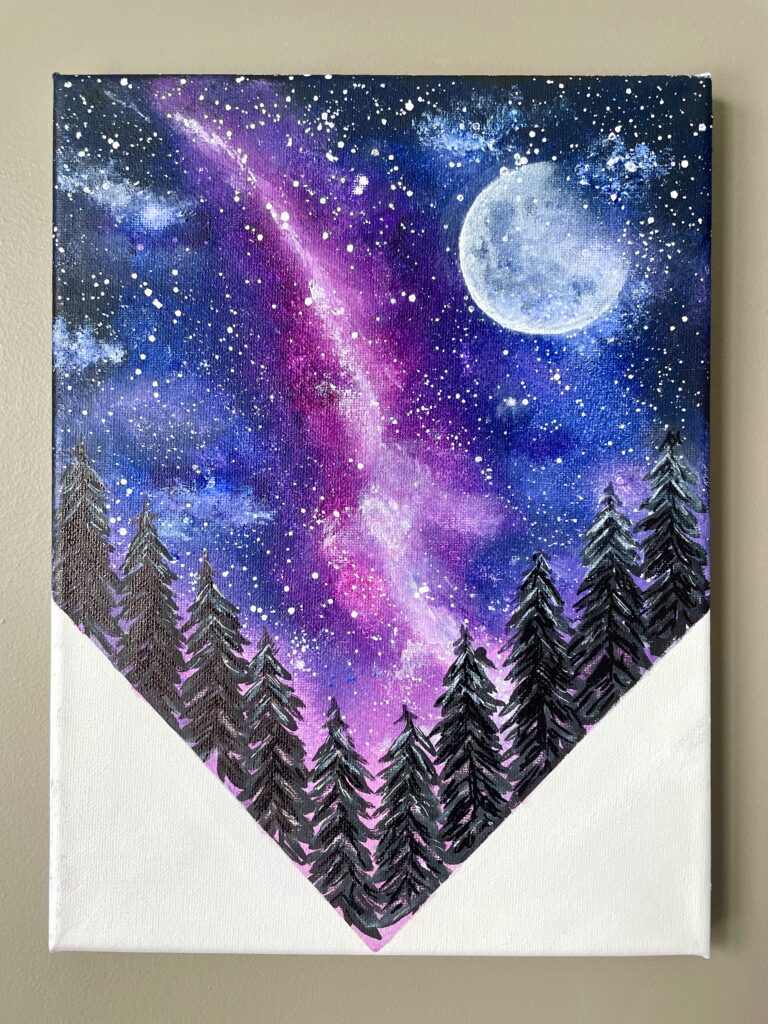
How to Paint a Galaxy Nighttime Sky
Are yous peckish to larn how to paint a galaxy nighttime sky? But you're scared it'due south too hard for beginners or y'all don't know where to begin? This tutorial (including a total length YouTube video) will bear witness yous, step-by-step, how to paint an easy galaxy night heaven – zero painting skills required! And the clandestine is in a unproblematic tool that I'll share with yous below…
If you're looking for more gorgeous nighttime sky paintings, check out this mesmerizing moon painting on black sheet, and this easy mermaid in moonlight painting.
What Colors Make a Milky way?
Ane of the starting time question you might have is what colors should you utilise in a galaxy?
Blackness is the first color that comes to listen when you lot recall of galaxies or infinite. But galaxies likewise incorporate some vibrant clouds of grit and gas which are known as nebulas. The colors in nebulas range betwixt cherry-red, magenta, blue, teal, green and white.
Galaxy Painting Colors
- Blackness/Dark Blue
- White
- Magenta
- Red
- Blue
- Green
- White
Demand Galaxy Dark Sky Inspo?
One of the best ways to get milky way ideas is to expect at high quality pictures from professional photographers.
Using a picture every bit inspiration can help you lot add some interesting features to your own painting. This can also help you with the shapes/proportions and even colors of your painting!
The picture I chose for inspiration is this picture of the Milky way taken by Denis Degioanni . You tin can utilize the website Unsplash to search for more pictures.

Tips on How to Pigment a Milky way Night Sky With a Sponge
Remember I was mentioning using a unproblematic tool to help blend your galaxy?
Information technology'south a sponge!
In this section I will go in depth on how to use your sponge to blend. For the total step-by step tutorial check out the guide at the finish of this post.
Using a sponge is surprisingly easy and a great tool for beginners. Sponges volition assistance you create foolproof and Astonishing blends without much effort. They are especially useful for beginners who might detect it challenging to alloy paint with a normal castor. I find using a sponge to blend pigment is way easier and requires less skill than using a castor.
And information technology's fun to use.
Types of Sponges For Blending
What kind of sponge works all-time?
You can utilise this blazon of artist sponge , which is what I used in this tutorial. Just if you don't want to spend extra $$ then you tin use a unproblematic kitchen sponge (a clean one of course). They volition both yield the same effect, only the creative person sponge will only be more than of a smoother looking blend.

Before using the sponge, you'll utilise a 1 inch flat brush to put your paint down.
You don't have to exist perfect hither (nor do you lot take to blend), since we volition exist blending with a sponge in the next step. Just take fun and get your paint on the sail as messy as you'd similar! The order of the colors are (from outside edges, in): black, blue, regal, pinkish and light pink at the bottom


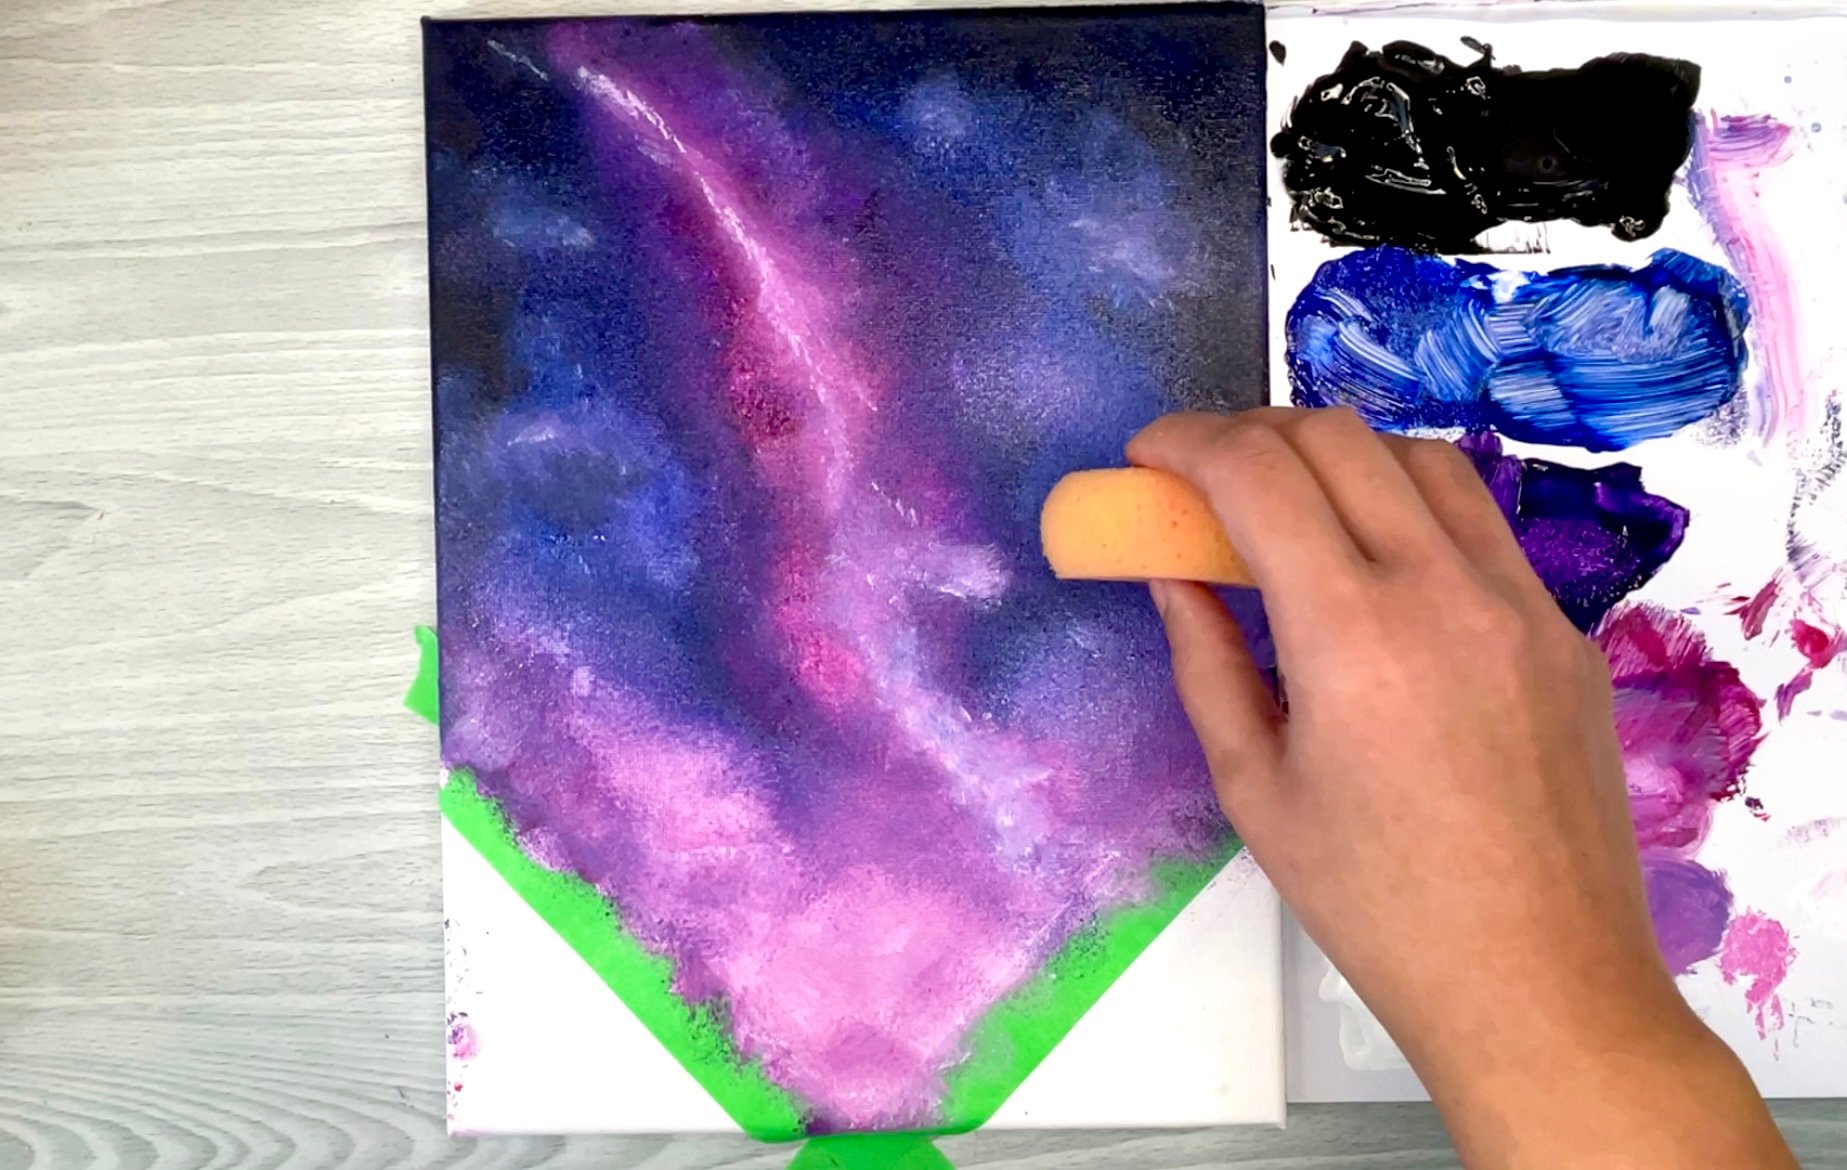
How To Alloy with a Sponge
Now for some fun sponge blending piece of work!
Using your sponge of pick, blend the borders between each color. Showtime with the lightest and work your way to the darkest (order below). To blend with a sponge use a light up and down dabbing movement like you're stamping. Don't printing too hard or you'll remove pigment from the sail.
Here is the blending order (to keep night colors from muddying the lite colors).
- Light pink with pinkish
- Pink with purple
- Purple with blueish
- Blue with black
Try to use a clean office on your sponge for each color blend. Once the sponge no longer has clean areas, rinse information technology off with water.
If you don't accept a sponge, you lot can blend with your castor using the same club above. Y'all can make clean off your brush with each alloy.

This first layer gives you the shape and color of your milky way galaxy sky. For the residual of the painting steps check out the full tutorial below.
Tips of blending with a sponge
- Piece of work with lightest colors to darkest so you don't darken the lightest colors.
- Utilise clean parts of sponge with each colour alloy
- Rinse sponge when all areas are covered with paint
- Blend by lightly dabbing your sponge (up and down) along border of colors
How To Paint Stars in a Galaxy
1 yous take your base colors of your galaxy night sky done, yous'll want to add together some stars. At that place are a few different means y'all can do it.
The first way is to splatter them (in tutorial beneath), pic them with a toothbrush and finally if yous desire more controlled where they go you tin can hand paint each one with a minor round brush.
How Do Y'all Flick Paint for Stars?
First y'all'll want to thin down your pigment. How do you lot thin out acrylic pigment? Simply mix one tablespoon h2o with 1 small dollop white paint. The consistency should be a thin liquid (like skim milk).
Then you lot'll simply dip whatsoever brush (I apply a wide apartment brush) in the thinned pigment. Next you'll concur the brush over your canvas and beginning borer it on another castor. You'll want to move your castor effectually your canvas to create splatter stars all over.
The first few flicks will give yous bigger stars. The more you tap your brush the smaller the stars you'll become(every bit the paint runs out on the bristles). I was able to become all the stars beneath with just one dip of my brush in the liquid paint.


For very small-scale stars splatter stars you can also dip an old toothbrush in the thinned downwards paint. With your toothbrush faced bristle side down, employ your thumb to flick the bristles back and forth. Yous'll become tiny splatters of paint on your sail.
I thing I like to do after using either the picture method or the toothbrush method in a higher place, is to add in extra stars with a small circular brush. This volition let you lot more than control and add in stars in your sky where it'due south more than bare.
Full YouTube Video Step-By-Footstep
Below is the full YouTube Video if you lot prefer video instructions.
How To Paint A Galaxy Dark Sky Footstep By Pace
Active Time one hour
Full Time 1 hour
Difficulty Beginner
Estimated Price $ten
Materials
- 9x12 Canvas
- Masking Tape
- Mars Black
- Dioxazine Imperial
- Ultramarine Blueish
- Quinacridone Magenta
- Titanium White
- Creative person Sponge (or regular sponge)
- i" Flat castor
- 1/four" angled castor
- Moon stencil (free download below)
Instructions
- For the full length YouTube tutorial, click here
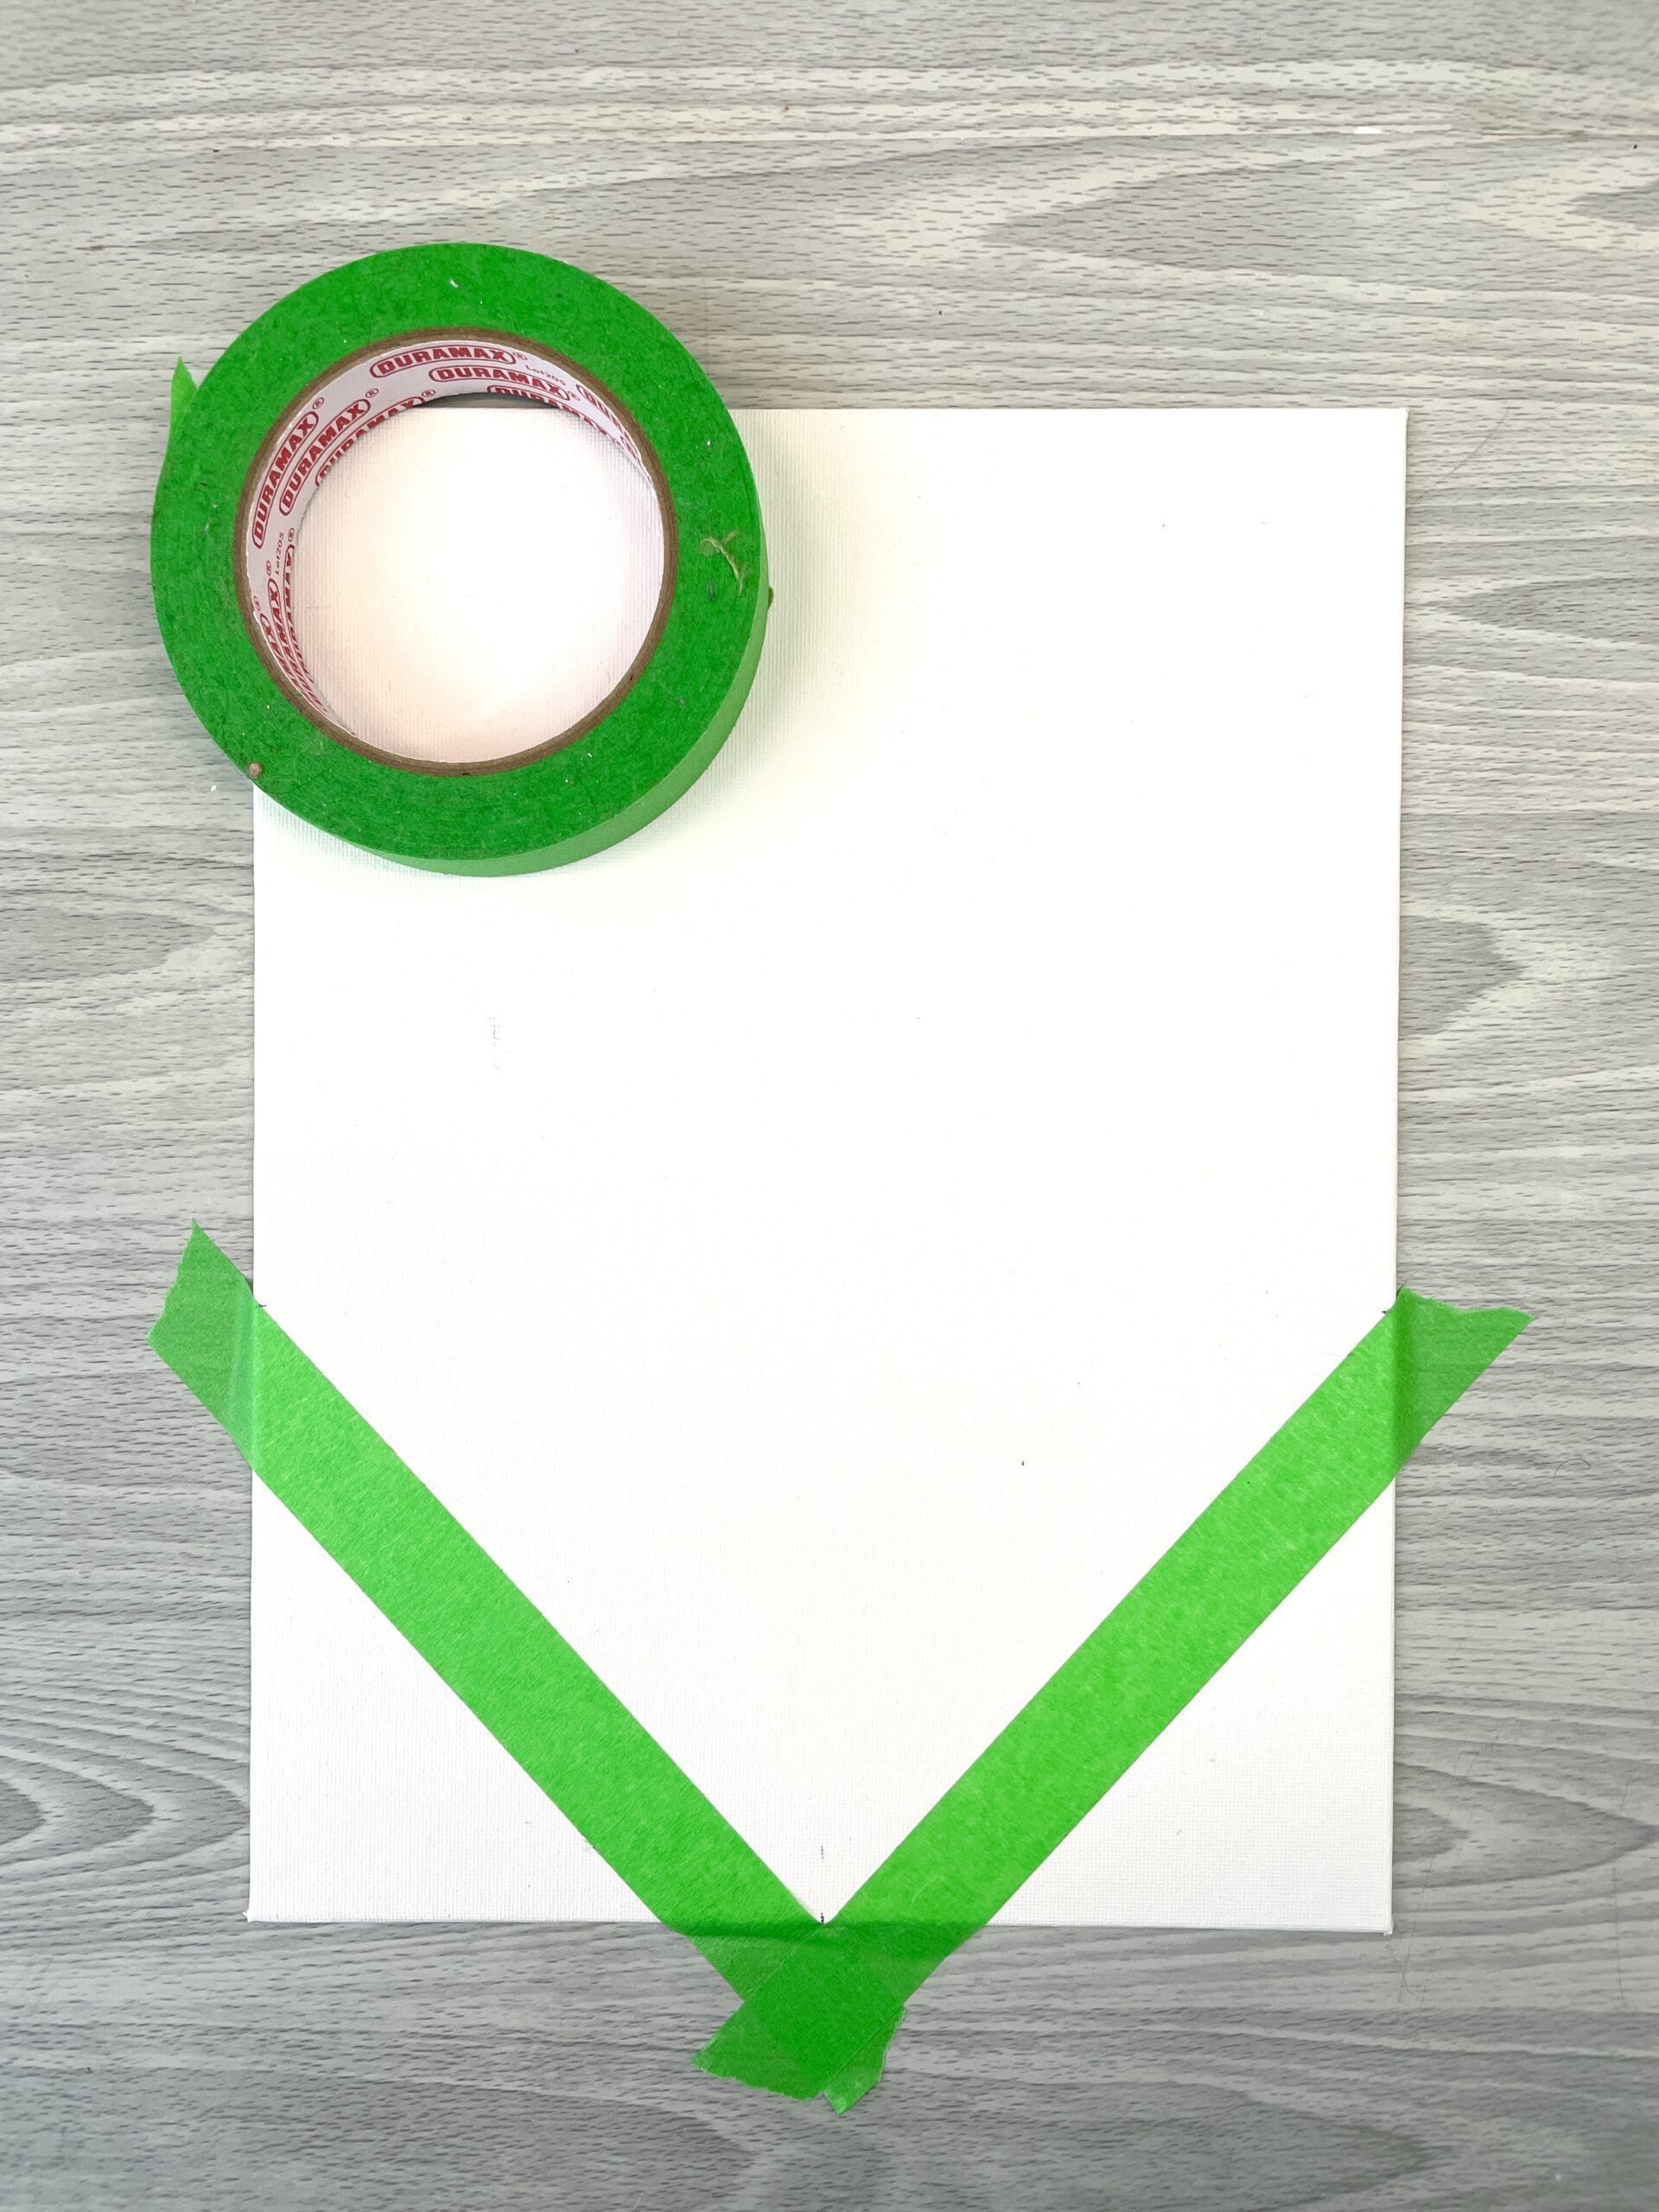
- Add masking tape to your canvas . Measure and mark the half mode on the bottom side of canvas. Mensurate and marker 7" down from top, on either sides of sail.
- Using a flat castor (1" or smaller) add your first layer of galaxy sky colors. From outer edge to inner in following order: blackness, blueish, majestic, pink, light pink. It doesn't have to be perfect, only slap the colors on canvas. Please refer to the sections above for more details.

- Take your sponge and blend each color starting with the lightest colors (calorie-free pink/pinkish, pink/purple, purple/blueish, blue/black). Please see section to a higher place for tips on how to blend with sponge.

- Let dry/semi-dry
- Since the offset layer will exist very thin after blending with a sponge, we are going to add a 2d layer of pigment. Repeat footstep ii-three with adding all the colors (black, blueish, purple, pink low-cal pink). And so blend equally higher up

- Using your brush add in some pure white into the middle of your galaxy. Blend very lightly with the sponge. It will look more light pink after the blending

- Accept a modest amount of light pinkish straight on your sponge and dab information technology in some nebula clouds effectually the sky. This will look very dimensional and pretty when all the stars are on top.
- Optional: If you want even more dimension in your milky way, Add some more pure white in the middle of your milky way and lightly blend with sponge.
- Take ane Tbsp water and mix it with a dollop of white paint to sparse information technology downwards. Have a brush, dip it in the thinned paint and start flicking it over the milky way night sky ( more details on how to pic stars in the section above).

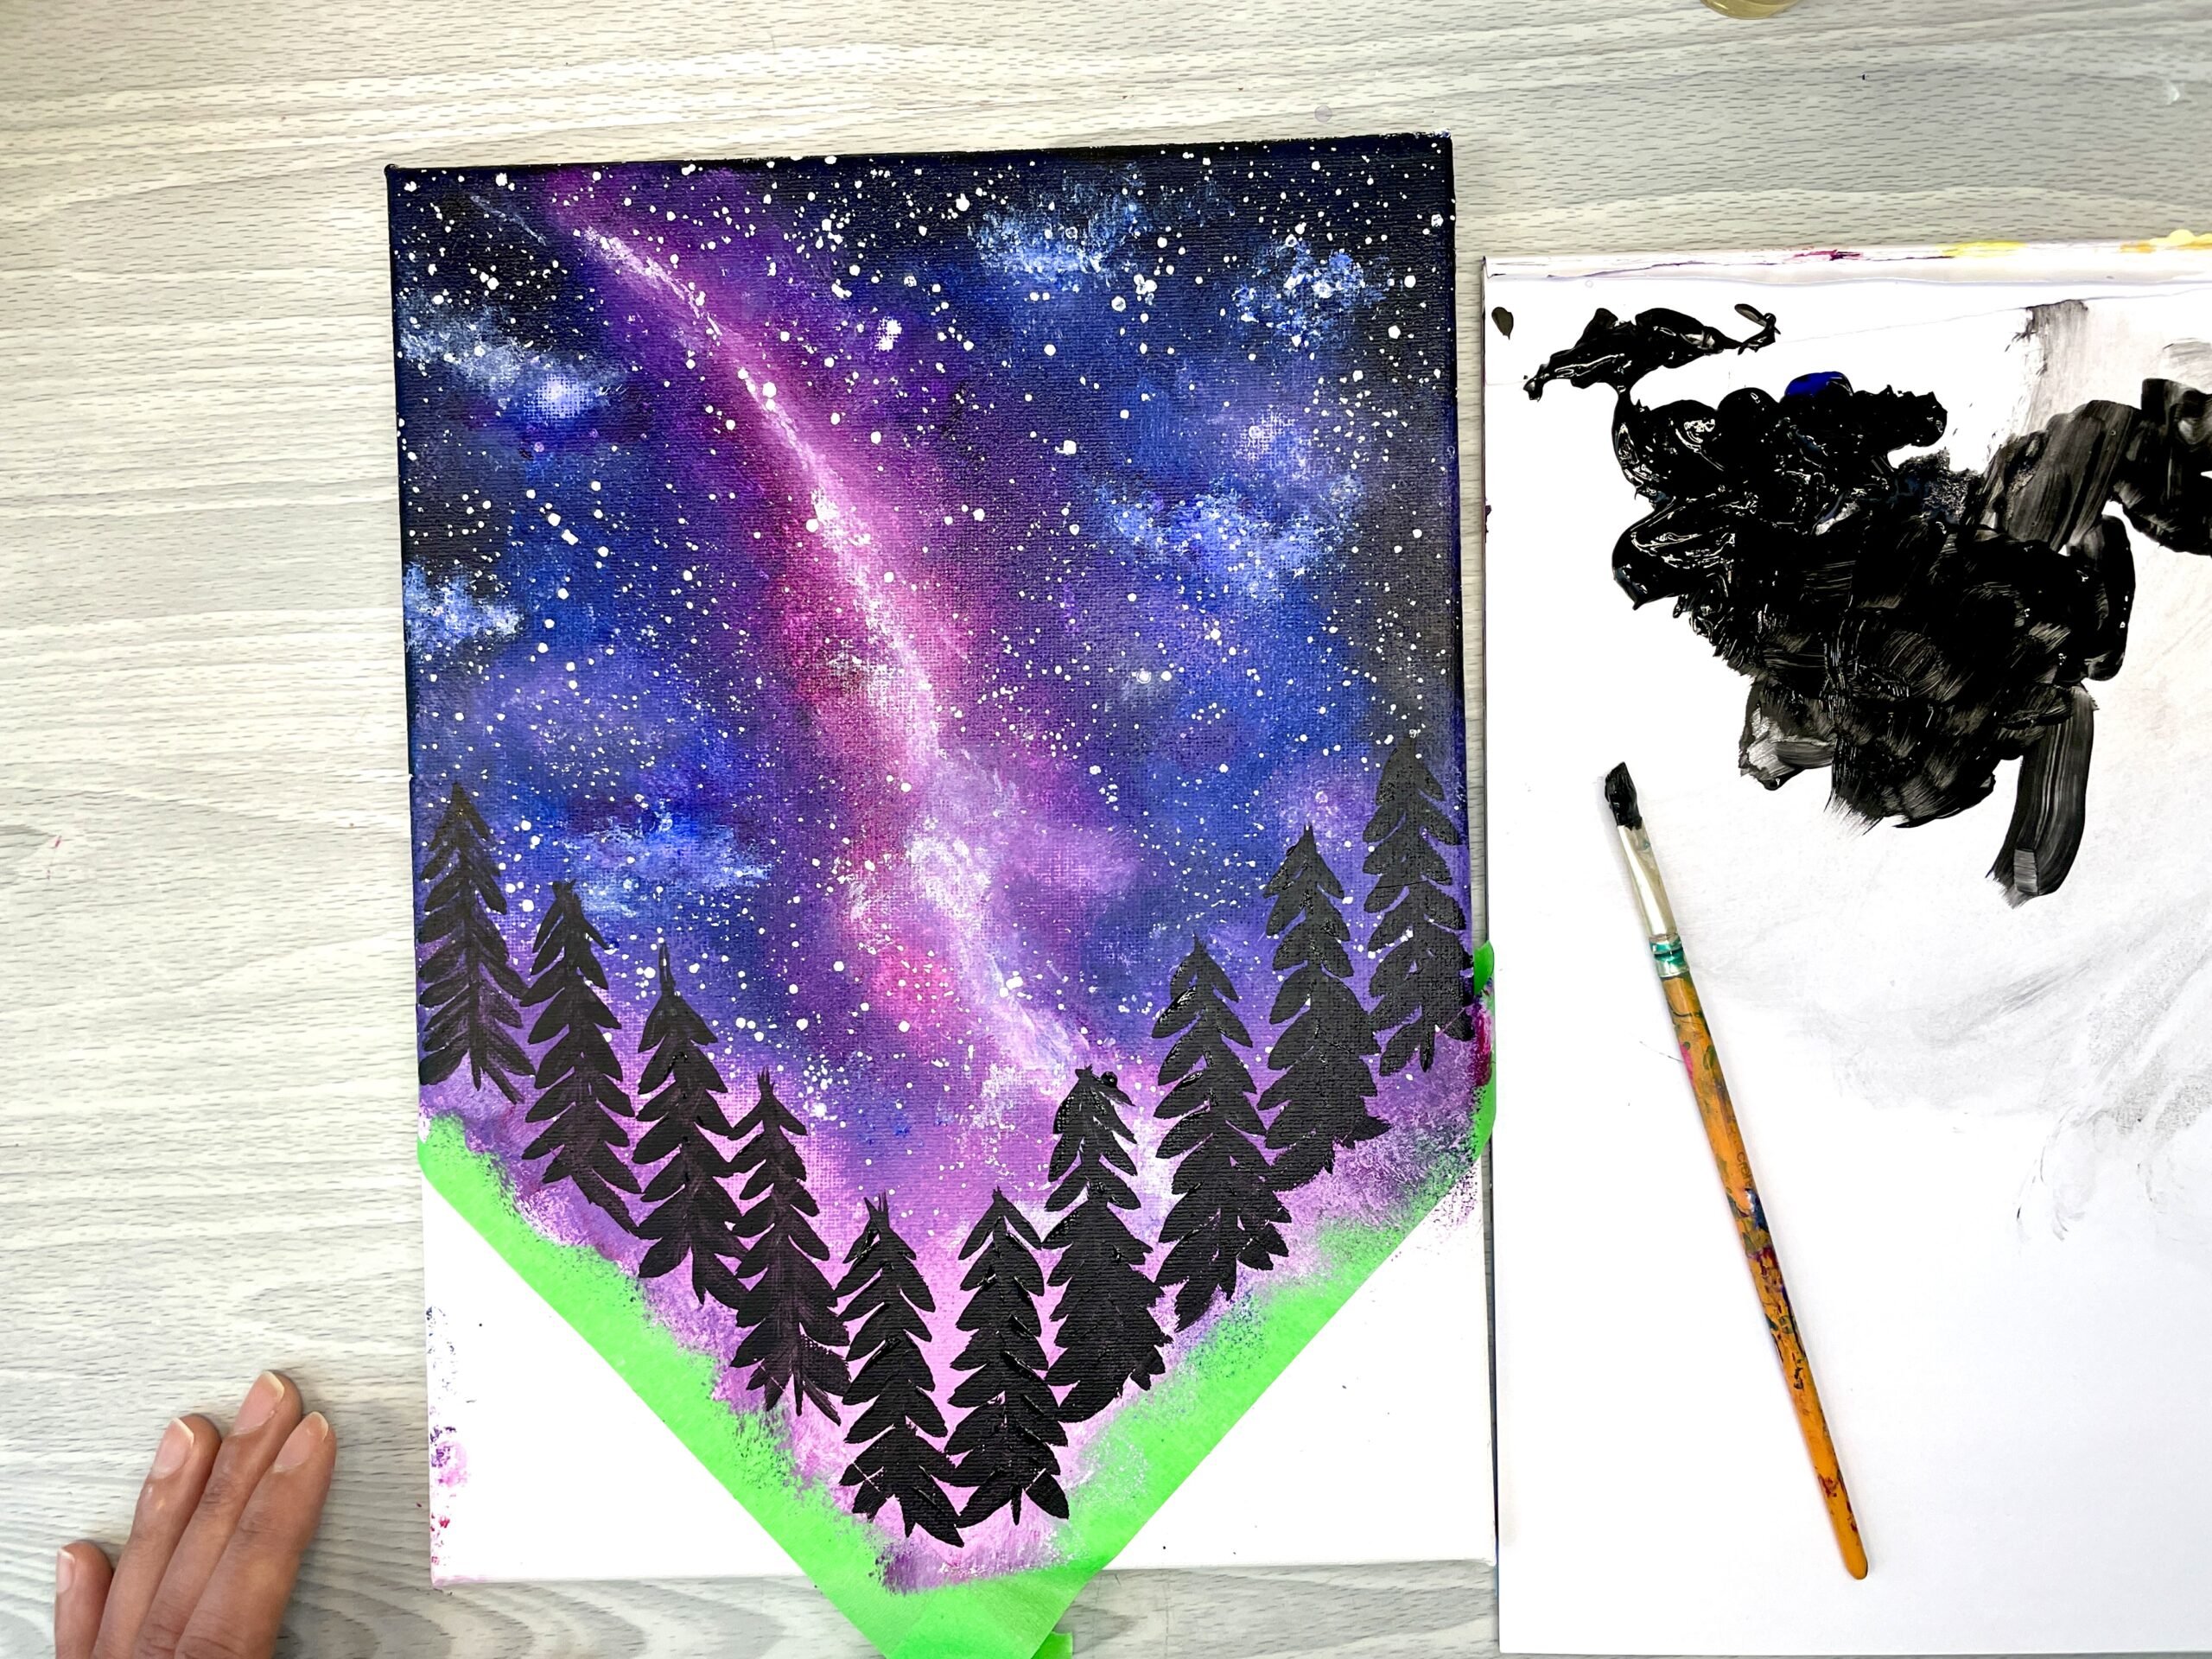
- After stars are stale, use a one/4" angled brush (or flat brush) with some black paint and paint on the silhouetted trees. If you thin down the black paint a bit it will be easier to paint with.
- Cut out your moon stencil (download in post beneath). Identify it in desired location. Apply some thinned white paint (from stars) to i/two of the moon. Utilize a sponge to alloy.

- Optional: Add some white to to the top of your trees using your angled castor or flat brush (moonlight reflecting off tree tops)


Recommended Products
As an Amazon Associate and member of other affiliate programs, I earn from qualifying purchases.
-
Scotch Rough Surface Painter'southward Tape, 1.41 inches x 60 yards, 2060, ane Roll
-
ZEM Brush Aureate Taklon Angle Shaders Brush Set Sizes 1/8", 1/4', 3/eight", 1/2"
-

Princeton Artist Brush Select Synthetic Brush Flat Wash 1" Width
-
Regal Castor Synthetic Artist Sponges, 3/Pack
-

Liquitex BASICS Acrylic Pigment, 4-oz tube, Quinacridone Magenta
-

Liquitex Nuts Acrylic Paint, 8.45-oz tube, Dioxazine Purple
-

Liquitex BASICS Acrylic Pigment, viii.45-oz tube, Ultramarine Blue
-

Liquitex BASICS Acrylic Pigment, 8.45-oz tube, Mars Blackness
-
Liquitex Basics Acrylic Paint, 8.45-Oz Tube, Titanium White
MOON STENCIL DOWNLOAD
Relieve the prototype below to your computer and print it out on standard 8.5×eleven printer paper. There are 4 moon stencils per canvass. Cut along the dotted lines to get your moon stencil.


If you liked this tutorial delight Pivot it on Pinterest!

Source: https://feelingnifty.com/how-to-paint-a-galaxy-night-sky/
0 Response to "How to Draw Galaxy With Acrylic Paint"
Post a Comment